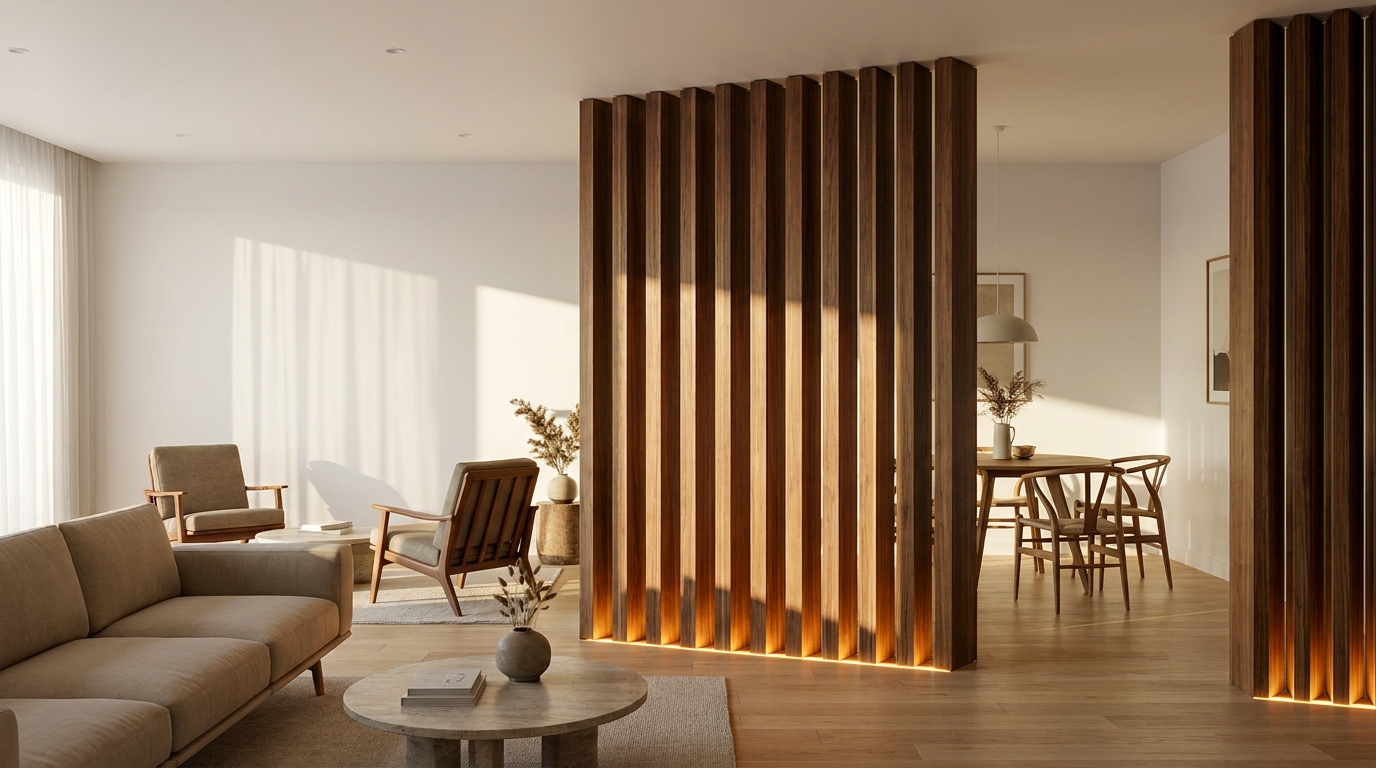
A Slat Divider Is Half Wood, Half Shadow
Every homeowner who has installed one notices the same thing within a week: the divider looks like a different object at 9am than it does at 9pm. That's not a flaw, it's the nature of the product. A row of vertical slats separated by open gaps is a structure made as much of shadow as of wood, and light is what draws those shadows. Wood slat divider lighting is therefore not a finishing touch to think about after installation — it's the variable that decides whether a permanently installed partition reads as a sculptural architectural feature or as a flat brown screen sitting in the middle of a room.
The good news is that the fix is rarely expensive or complicated. It's mostly a matter of understanding where light is coming from relative to the slats, and adding one deliberate light source where the room doesn't already provide one.
Front Light Flattens, Side Light Sculpts
The single most useful principle: light striking the slats straight on, from directly in front, erases the depth. Every slat face is lit evenly, the gaps between them lose contrast, and a 2"-deep piece of walnut ends up looking like a printed pattern on a wall.
Light arriving at an angle does the opposite. When a source sits off to one side, each slat catches light on one face and casts a shadow across the gap behind it, which is what produces the ribbed, three-dimensional rhythm the product is actually for. This is why the same divider can look extraordinary in a room with a window down one wall and unremarkable in a room lit by a single ceiling fixture overhead.
Practical takeaway: before deciding on a lighting plan, stand in the room at two or three points in the day and look at where the shadows fall on the slats. If they're barely there, the room is front-lighting the divider and one angled source will transform it.
Which Direction Actually Matters
For a partition running perpendicular to a window wall, daylight already rakes across the slats at a low angle for part of the day and the divider mostly lights itself. For a partition running parallel to the window, the light hits the slat faces head-on and the depth disappears — that's the case that benefits most from adding a dedicated fixture positioned to one end of the run rather than centred in front of it.
Uplighting: The Highest-Impact Move
If there's one lighting technique that suits a permanently installed slat divider better than any other, it's uplighting from the floor. A narrow-beam floor washer or a recessed floor uplight placed close to the base of the slats throws light straight up the length of the wood, exaggerating grain, stretching shadow lines vertically, and making the divider read as taller than it is.
This works particularly well with Primo Panels' pre-finished veneer options. Walnut and Dark Walnut have enough figure in the grain that raking light picks up amber and caramel variation that flat overhead lighting completely misses, while White Oak takes uplighting in a cleaner, more even way that suits a brighter Scandinavian palette. Because the divider is glued or screwed to ceiling and floor as a permanent architectural fixture, uplights can be planned into the floor detail during installation rather than added as visible plug-in units afterward — the reason it's worth deciding on lighting before the install date, not after.
For homeowners not doing floor work, a pair of slim floor-standing uplights tucked at either end of the run gets a large portion of the same effect with no construction involved.
Overhead Lighting: Pull the Fixture Back
Recessed ceiling lights are the most common existing lighting in the rooms these dividers go into, and they're workable — the mistake is placing them directly above the divider. A downlight centred on the slats lights the top edge and nothing else, leaving the lower two-thirds in dull shadow and creating a hard bright line at the ceiling.
Setting recessed fixtures roughly 12 to 18 inches back from the face of the divider, on one side, produces a grazing wash down the wood instead. Adjustable gimbal trims are worth the small upgrade cost here, since they let the beam be aimed at the slats after everything is installed and the exact effect can be judged in the actual room.
Backlighting and the Glow Effect
Placing a light source behind the divider rather than in front produces something different again: the gaps between slats become bright lines and the slats themselves silhouette. In a room where the divider separates a darker zone from a brighter one — a home office from a daylit living area, for instance — this happens naturally for part of the day and is one of the more striking effects the product produces.
It can be created deliberately with a warm floor lamp or a wall washer placed on the far side. It's worth noting that backlighting mutes the wood tone by design; if the finish itself is the point, front-angled or uplighting will show it better.
Rotating Slats Change the Lighting Equation
Primo Panels' ROTERA system, with slats that rotate to open or close the gaps, adds a dimension fixed installations don't have. Rotating the slats changes the angle at which every face meets the light, which means one divider produces a range of effects from the same fixtures — open for maximum light transmission and visible depth, closed for a more solid, enclosed wall of wood with tighter shadow lines. FIXERA, the fixed-slat system, holds one consistent geometry, which makes it easier to plan a lighting scheme around precisely because the result never changes.
Homeowners who care most about the lighting effect specifically should also think about slat profile. A 2"x6" cross-section casts a considerably deeper shadow than the standard 2"x4", and wider gaps let more light through while narrower gaps produce denser, more dramatic banding. These are permanent decisions made at order time, which is why they're worth modelling against the room's real light before committing.
Colour Temperature and Wood Tone
Warm light in the 2700K range flatters every finish Primo Panels offers and is the safe default — it pushes Walnut toward its amber range and keeps White Oak from reading grey. Cooler light around 4000K strips warmth out of veneer and tends to make wood look ashen, which is usually the wrong choice in a residential setting. The exception is a paintable MDF divider finished in a cool or neutral colour, where cooler light can suit the intended palette. Consistency matters more than the exact number: mixing colour temperatures across fixtures aimed at the same divider produces visible colour banding down the slats.
Planning It Before the Divider Goes In
A slat divider is a permanent installation and a long-term investment in the room, so the lighting deserves the same planning as the divider itself. Decide where the angled or uplight source is coming from, confirm the finish under that light with a sample, and choose profile and spacing knowing how each affects shadow depth. Primo Panels ships samples in all finishes free of charge, which is the most reliable way to judge how Walnut, Dark Walnut, or White Oak behaves under a specific room's actual lighting rather than under a photograph's.
From there, the Build and Price Your Divider tool at primopanels.com turns wall width, ceiling height, finish, system, and gap spacing into an exact slat count and price — so the lighting plan and the divider spec can be settled together, before anything is installed.